Monday, April 9, 2012

A Patisserie in the Springtime

Doesn't everyone dream of going to Paris? I know I do. I have not made it there yet, but my daughter will be going in a few months on a student exchange trip. Choosing a French theme for her birthday party was an obvious choice. I decided to model the dessert table after a patisserie, making it look as realistic as I could. I made food labels in french, complete with prices in Euros. The french blue wall making a pretty backdrop once adorned with a chalkboard menu, french calendar and framed pastries. 
The menu included palmiers, macaroons, meringue cookies, cream puffs, mocha madeleines, fruit tarts and brownie cakes. I looked at many pictures of real french bakeries before deciding on the menu and tried to keep to items that really would be sold there. The tarts and tulips were as pretty as a picture. White chocolate Eiffel towers were handed out as favors. I used my tea set and collection of tea cups to add some color and charm. The dessert table transformed the room. The guests were enchanted. And the birthday girl, she will carry the love of family with her while she walks down the streets of Paris.
Vendor credits below.


Party Styling and Baked Goods:  Jeannie Gearin

Photography:  Marisa Gearin

Calendar:  Sycamorestreetpress.etsy.com/shop/
Framed Art Work:  FrenchGallery.etsy.com/shop/
Eiffel Tower Poster: MissInsouciance.etsy.com/shop/ 
Macaroons  janjoupatisserie.etsy.com/shop/
Invitation:  GreenBeansieInk.etsy.com/shop/
Pastry tags:  bellaseradesigns.etsy.com/shop/

Tuesday, March 20, 2012

Robot Birthday Party

 {Featured on A Blissful Nest}
This birthday party theme was chosen by the birthday girl who wanted robots. The printables are all by A Blissful Nest and they provided great inspiration for the cake, cookies and cupcakes. The cupcake toppers were cut with a scalloped cutter and taped onto drink stirrers which are food safe and are easy to cut.

The cake was just for the birthday girl and covered in gears and cogs made from a mold by decoratethecake.com. A mix of fondant and gumpaste is used to fill the molds and then placed in the freezer for a few minutes to set the fine lines of the mold.
The bright yellow wall was a great background and the red chevron table runner made everything pop. The table runner is from Fine Pillow Covers on etsy. I can always find what I need for a party on etsy.    
    

I hand molded some little screws to give more dimension to the cupcakes. The primary color sprinkles and the gray cupcake liners finished off the look.


Sugar cookies are topped with fondant discs attached with a little icing and a couple of gears are all they need. A dot border is added in icing.


Finding candy in coordinating colors is so easy now that the dessert table trend has become so popular. Party City has an aisle of colored candy to match any party.

The invitation with the gears and chevron detail was perfect for our party.


A little ribbon and candy labels dress up the candy jars. I have a collection of basic shapes and use the same ones over and over. 


The vinyl wall decals are made by Decal Farm on etsy. These went onto the wall easily and came off without damaging the paint. I was able to choose the exact colors I wanted. After the party, some went up in my daughter's room and some were used in the locker at school. The favor bags and favors are from Michael's.

This is how I plan a party because I have fun doing it and going to a little extra effort makes a big difference. It does not take much work to throw a memorable party.


Friday, March 9, 2012

Biscoff Cupcakes

 I can't get enough of the flavor of Biscoff cookies. Now, they not only have Biscoff spread, they also make Biscoff Sprinkles!! Of course, I immediately started thinking about the best cupcake combinations to showcase those sprinkles. Maybe banana and chocolate would be best? You can never go wrong with a chocolate cupcake, but that might be too much with chocolate icing.
 So, the combination I settled on was a cream cheese cupcake with a Biscoff filling, chocolate fudge frosting and the Biscoff sprinkles on top, where they belong.
 This is what the box looks like, so you can find it. My international grocery store carries it.
 A cookie half on top was really not too much.


Biscoff Filling


1/4 cup Biscoff Spread
2 ounces cream cheese
2 ounces unsalted butter
1 cup light brown sugar
1 tablespoon half and half

In a medium bowl with a hand mixer, beat until smooth. This makes enough filling for 24 cupcakes using a cupcake plunger.
Consistency of filling may be adjusted to desired consistency by adding more half and half.

Thursday, March 1, 2012

Birthday Cake Chex Mix

I love Birthdays. I guess because I love parties and cake, and any excuse to break
from normal routine and celebrate. Growing up, a birthday cake usually meant
a box cake mix, but we looked forward to it with great anticipation.
To me, that flavor elicits memories of home, family, and good times. 
This simple recipe captures that flavor and it is just right for any birthday party.
 The yummy part, cereal coated in white chocolate and vanilla frosting,
tossed in powdered sugar and white cake mix.
 
 The cereal coated in multi-colored non-pareils just screams "party!"

A word of warning: it is very hard to stop eating Birthday Cake Chex Mix,
so be sure to share!


Birthday Cake Chex Mix
18 servings (1/2 cup each)
9 cups Rice Chex or Corn Chex (or combination)
1 ½ cups white chocolate chips
1 cup ready to spread vanilla frosting
4 ounces multi-colored non-pareils candy sprinkles
¾ cup powdered sugar
¾ cup boxed white cake mix
1 package birthday candy cake decorations

1. In a large bowl, measure cereal; set aside.
2.  In a 1-quart microwavable bowl, microwave white chocolate chips on 70% power for 45 seconds and stir well. Heat for an additional 20 seconds longer or until mixture is smooth without any lumps remaining. Pour melted chocolate over cereal, tossing to coat.
3.  In a small microwavable bowl, melt vanilla frosting for 15 seconds on high power and stir. Heat frosting for seconds more if needed for smooth consistency. Pour over cereal and stir until evenly coated. Note: Do not melt chocolate and frosting together or the chocolate will seize.
4. Put 2 cups of cereal in a 1-gallon food storage resealable plastic bag and add the non-pareils. Shake until well coated. Spread on waxed paper to cool.
5. Put remaining 7 cups of cereal in 2-gallon food storage resealable plastic bag. Add the powdered sugar and cake mix. Seal bag; shake until well coated. Spread on waxed paper to cool.
6.  Place all of the coated cereal and the candy cake decorations in an airtight container to store.

Wednesday, February 22, 2012

Irish Tea Cupcakes


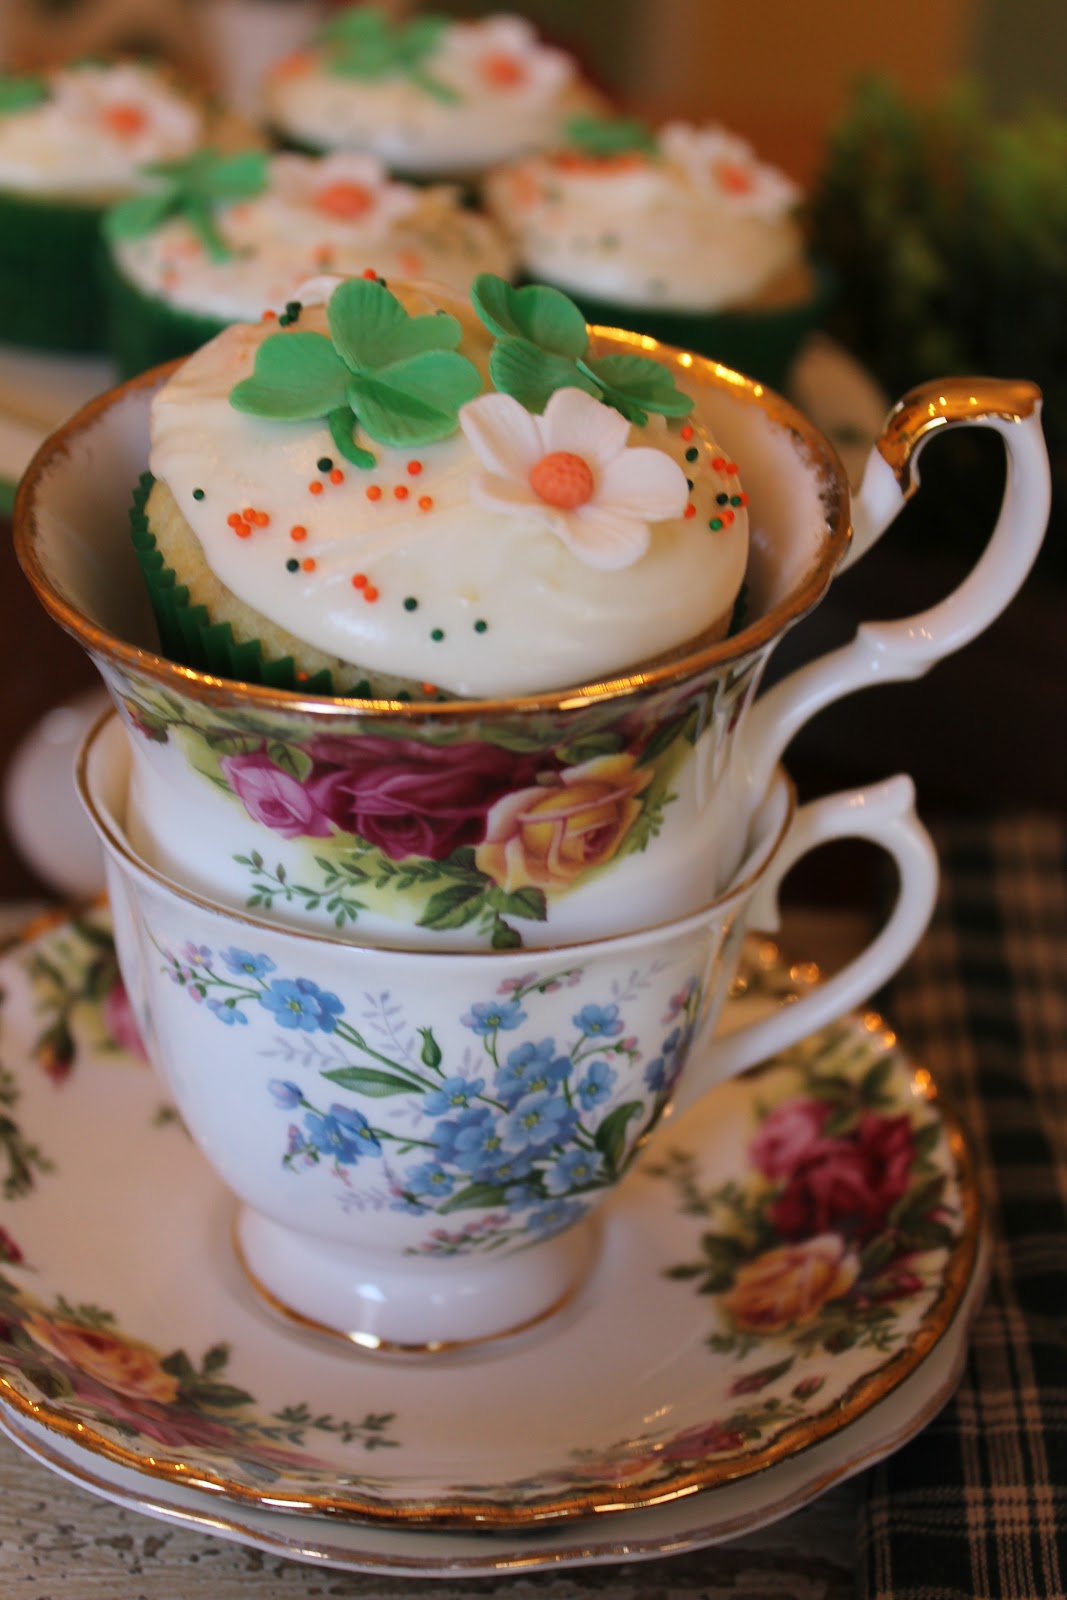
 This year I tried to be a little more authentic and attempted a cupcake that tastes like a cross between Irish Soda Bread and Irish Tea Cake. I went with an icing that is close to something you might want to spread on Irish Soda Bread. I think it turned out pretty good.

 The decorations are made with a heart cutter and gumpaste. I assembled the three hearts with a stem to form the shamrocks. I made white flowers with an orange center to incorporate the colors of the flag.
 The recipe calls for rehydrating the raisins in Irish Breakfast Tea. I think it really adds to the flavor. I am sure some of you will skip this step, it is a little fussy, but what is an Irish Tea Cupcake without tea?
Recipe Follows.


These really Irish cupcakes can be enjoyed whether you are really Irish or not.


Irish Tea Cupcakes

2 bags Irish Breakfast tea                                            1 cup boiling water
1 cup raisins                                                                    1 tablespoons honey
2 cups cake flour                                                           1 teaspoon baking powder
½ teaspoon baking soda                                              ½ teaspoon salt
½ cup unsalted butter, softened                                ¾ cup granulated sugar
1 large egg                                                                      1 cup buttermilk
In a 2 cup measuring glass, bring one cup of water to a boil in the microwave. Add two tea bags and let brew for 5 minutes. Remove tea bags and stir in tablespoon of honey then add raisins to soak. Set aside for thirty minutes.
Preheat oven to 350 degrees. Line muffin pans with 20 cupcake liners. Set aside.
Whisk together the dry ingredients in a medium bowl. Set aside.
In a large bowl with a hand mixer, beat butter until creamy and then add sugar to combine. Add the egg and mix well. Stir in half of the dry ingredients, the buttermilk, and then the rest of the dry mixture, stirring well after each addition.
Drain the raisins and stir into the batter until they are evenly distributed.
Use a spring loaded scoop to fill the cupcake liners, a little over halfway. Evenly distribute the batter to make 20 cupcakes.
Bake the cupcakes for 18 – 20 minutes or until lightly browned. Let cool.

Orange Marmalade Frosting
4 tablespoons butter, softened                                                 1 tablespoon orange juice
3 tablespoons orange marmalade                                            5 cups powdered sugar
In a medium bowl with a hand mixer, cream the butter and orange juice until creamy. Add the orange marmalade and mix well. Gradually stir in the powdered sugar on low speed and beat until smooth.
Frost the cupcakes.


Thursday, January 19, 2012

Cupcakes and Mold Making

A lemon cupcake with cream cheese frosting decorated with a molded
fondant cupcake.
Making silicone molds is very simple. I use silicone plastique from makeyourownmolds.com
As you can see I bought a lifetime supply.  I bought the materials at the Oklahoma Sugar
Art Show and did not have to pay shipping so I got the large bucket. All you have to do
is mix the two compounds together until they are a uniform color. 
The modeling material is workable for about 20 minutes. First apply a thin layer over the item
you want to mold then, completely cover it. I used a cupcake eraser. It is a little messy and
sticky so working on silpat is helpful.

The mold takes about one hour, and sometimes more, to completely dry.
The mold is ready to use. That's it! I have been wanting to mold this
cupcake eraser for awhile. I love how it turned out.
I think it is perfect for Valentine's Day.


I used a large french pastry tip to decorate the cupcakes.
The one I have is an Ateco 9FT.
Happy Valentine's Day!

Tuesday, December 20, 2011

Gingerbread with Edible Images

Almost any kind of paper can be used for making edible images. Scrapbook paper, wrapping paper or
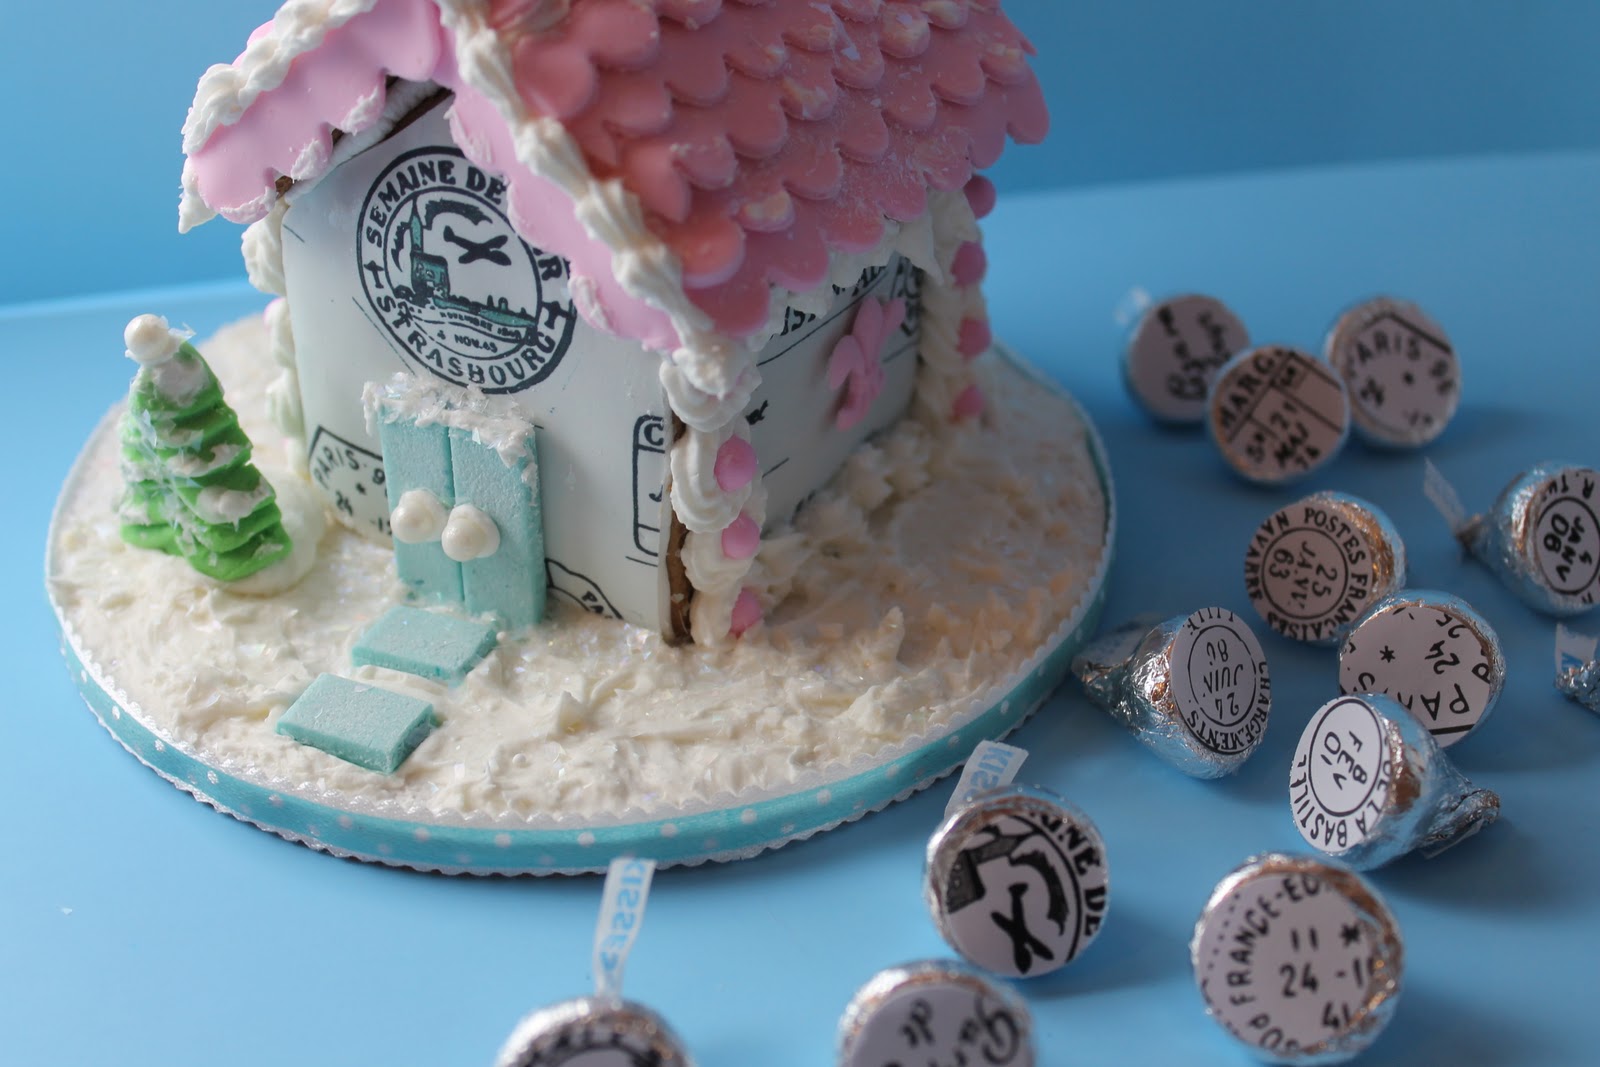
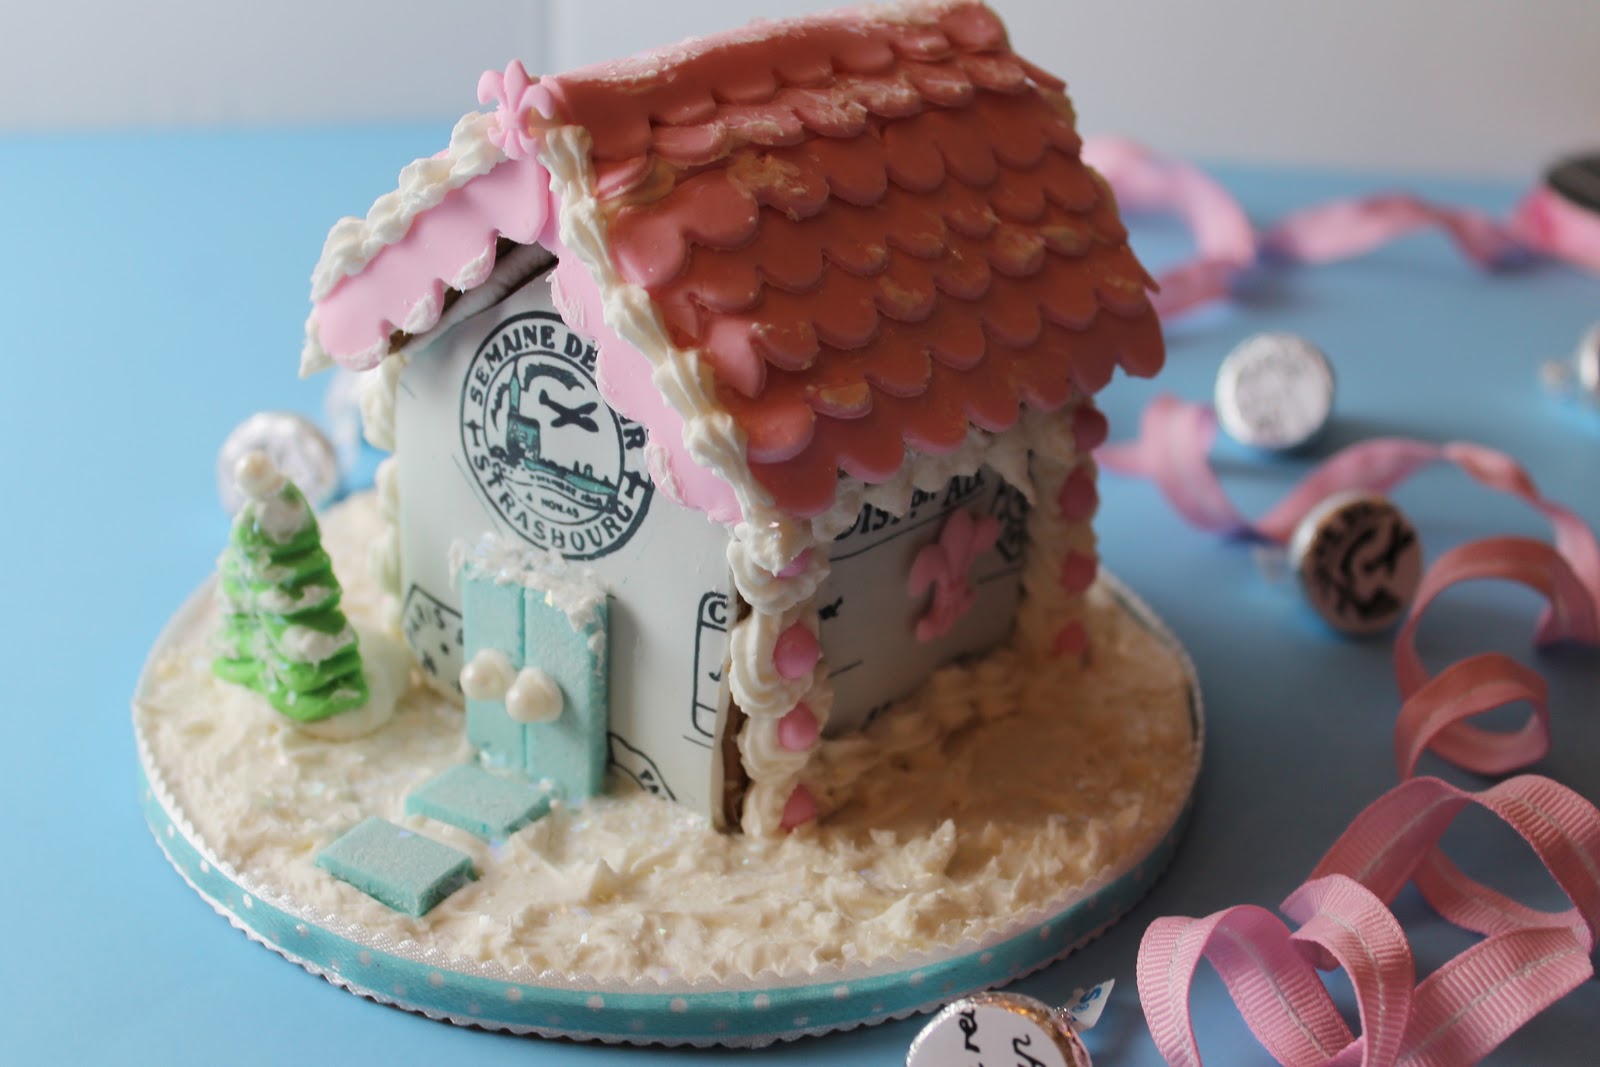
printables from the internet are all good options. I used a french postmark from Cathe Holden's website justsomethingimade.com for this project. I cut apart the images, spread them apart and reprinted to make it work for the gingerbread house. Then I took it to my local cake shop
and had them print an edible image for me.

 Roll out fondant larger than the edible image you want to use, it should be fairly thin.
 I use a spray bottle of water (like the kind you get in an airline travel kit) to attach the
edible image to the fondant. Use a paper towel or fingertip to spread the water evenly.
It should be damp with no puddling.
 Lay the gingerbread pieces on top and use as a pattern to cut out the edible image
pieces. Pay attention to what designs you are cutting.
 Piping gel and a brush work best to attach the fondant to the gingerbread.
Lay the pieces facedown to elimante bubbles.
 Once all of the pieces are covered, assemble the house with royal icing as you normally
would. Candy and fondant decorations can be attached to the edible image pieces.
 I used more of the printable paper to decorate the Hershey's Kisses.
Gingerbread houses make great centerpieces. They are charming in the middle of cookie trays.
That is where mine will be. Happy Holidays!