Thursday, March 1, 2012

Birthday Cake Chex Mix

I love Birthdays. I guess because I love parties and cake, and any excuse to break
from normal routine and celebrate. Growing up, a birthday cake usually meant
a box cake mix, but we looked forward to it with great anticipation.
To me, that flavor elicits memories of home, family, and good times. 
This simple recipe captures that flavor and it is just right for any birthday party.
 The yummy part, cereal coated in white chocolate and vanilla frosting,
tossed in powdered sugar and white cake mix.
 
 The cereal coated in multi-colored non-pareils just screams "party!"

A word of warning: it is very hard to stop eating Birthday Cake Chex Mix,
so be sure to share!


Birthday Cake Chex Mix
18 servings (1/2 cup each)
9 cups Rice Chex or Corn Chex (or combination)
1 ½ cups white chocolate chips
1 cup ready to spread vanilla frosting
4 ounces multi-colored non-pareils candy sprinkles
¾ cup powdered sugar
¾ cup boxed white cake mix
1 package birthday candy cake decorations

1. In a large bowl, measure cereal; set aside.
2.  In a 1-quart microwavable bowl, microwave white chocolate chips on 70% power for 45 seconds and stir well. Heat for an additional 20 seconds longer or until mixture is smooth without any lumps remaining. Pour melted chocolate over cereal, tossing to coat.
3.  In a small microwavable bowl, melt vanilla frosting for 15 seconds on high power and stir. Heat frosting for seconds more if needed for smooth consistency. Pour over cereal and stir until evenly coated. Note: Do not melt chocolate and frosting together or the chocolate will seize.
4. Put 2 cups of cereal in a 1-gallon food storage resealable plastic bag and add the non-pareils. Shake until well coated. Spread on waxed paper to cool.
5. Put remaining 7 cups of cereal in 2-gallon food storage resealable plastic bag. Add the powdered sugar and cake mix. Seal bag; shake until well coated. Spread on waxed paper to cool.
6.  Place all of the coated cereal and the candy cake decorations in an airtight container to store.

Wednesday, February 22, 2012

Irish Tea Cupcakes


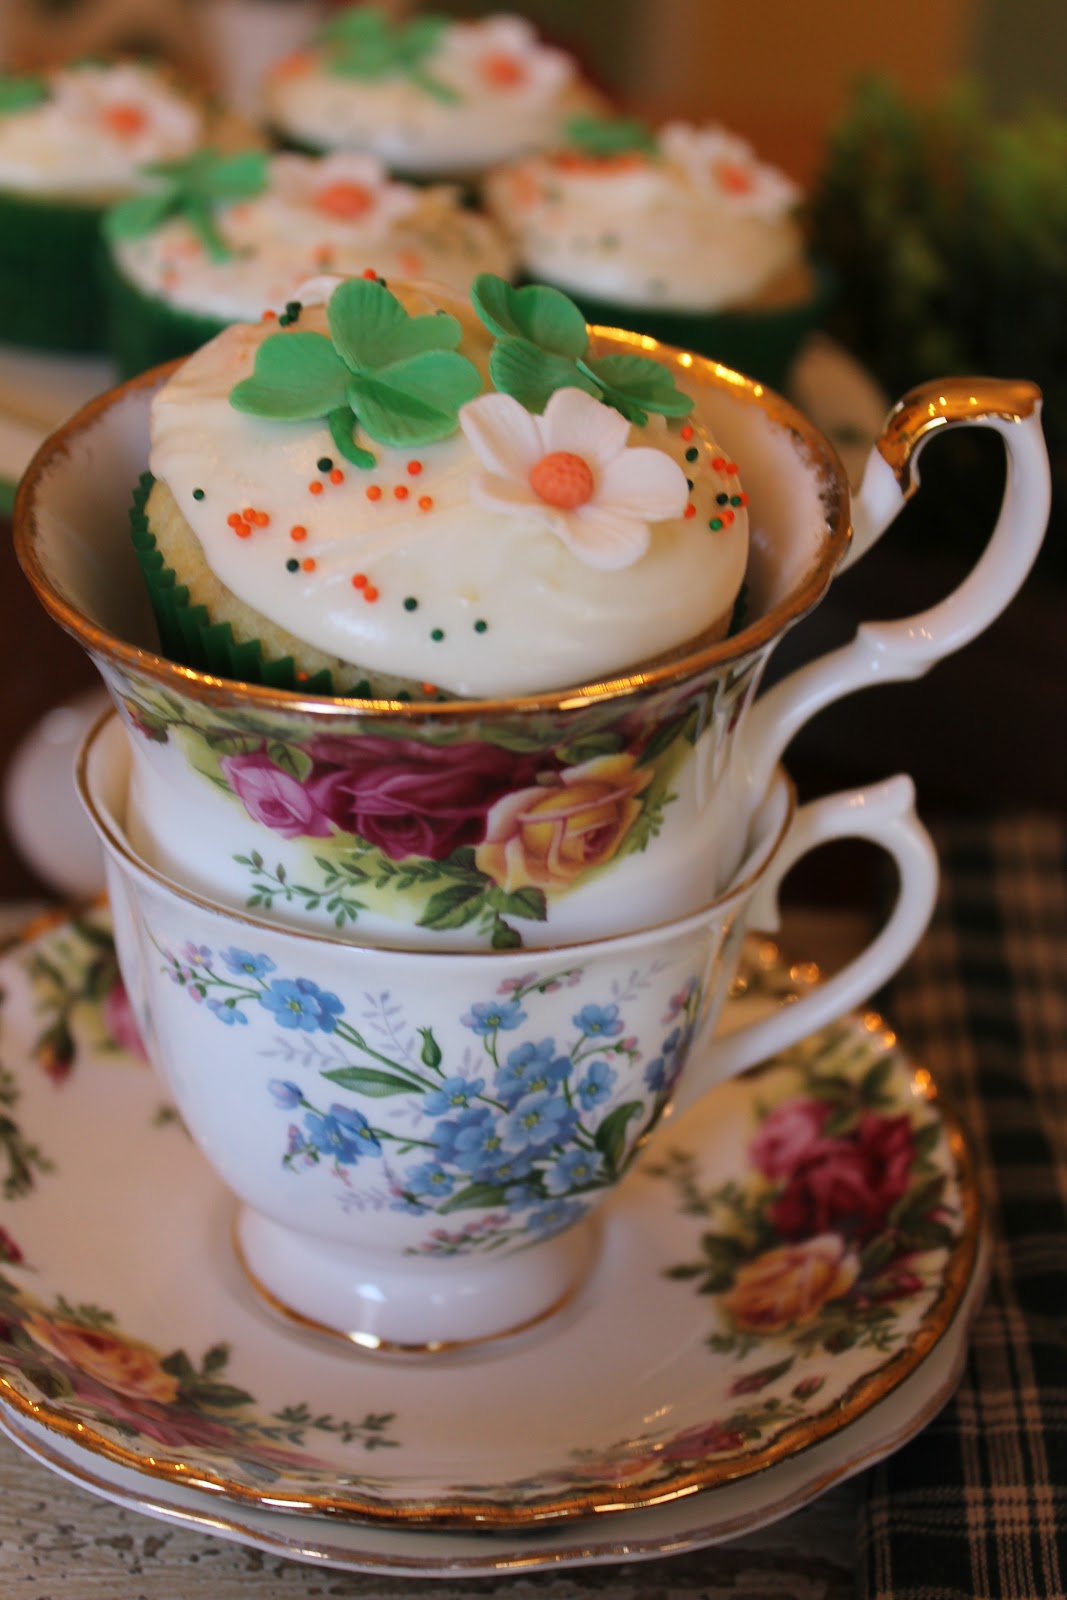
 This year I tried to be a little more authentic and attempted a cupcake that tastes like a cross between Irish Soda Bread and Irish Tea Cake. I went with an icing that is close to something you might want to spread on Irish Soda Bread. I think it turned out pretty good.

 The decorations are made with a heart cutter and gumpaste. I assembled the three hearts with a stem to form the shamrocks. I made white flowers with an orange center to incorporate the colors of the flag.
 The recipe calls for rehydrating the raisins in Irish Breakfast Tea. I think it really adds to the flavor. I am sure some of you will skip this step, it is a little fussy, but what is an Irish Tea Cupcake without tea?
Recipe Follows.


These really Irish cupcakes can be enjoyed whether you are really Irish or not.


Irish Tea Cupcakes

2 bags Irish Breakfast tea                                            1 cup boiling water
1 cup raisins                                                                    1 tablespoons honey
2 cups cake flour                                                           1 teaspoon baking powder
½ teaspoon baking soda                                              ½ teaspoon salt
½ cup unsalted butter, softened                                ¾ cup granulated sugar
1 large egg                                                                      1 cup buttermilk
In a 2 cup measuring glass, bring one cup of water to a boil in the microwave. Add two tea bags and let brew for 5 minutes. Remove tea bags and stir in tablespoon of honey then add raisins to soak. Set aside for thirty minutes.
Preheat oven to 350 degrees. Line muffin pans with 20 cupcake liners. Set aside.
Whisk together the dry ingredients in a medium bowl. Set aside.
In a large bowl with a hand mixer, beat butter until creamy and then add sugar to combine. Add the egg and mix well. Stir in half of the dry ingredients, the buttermilk, and then the rest of the dry mixture, stirring well after each addition.
Drain the raisins and stir into the batter until they are evenly distributed.
Use a spring loaded scoop to fill the cupcake liners, a little over halfway. Evenly distribute the batter to make 20 cupcakes.
Bake the cupcakes for 18 – 20 minutes or until lightly browned. Let cool.

Orange Marmalade Frosting
4 tablespoons butter, softened                                                 1 tablespoon orange juice
3 tablespoons orange marmalade                                            5 cups powdered sugar
In a medium bowl with a hand mixer, cream the butter and orange juice until creamy. Add the orange marmalade and mix well. Gradually stir in the powdered sugar on low speed and beat until smooth.
Frost the cupcakes.


Thursday, January 19, 2012

Cupcakes and Mold Making

A lemon cupcake with cream cheese frosting decorated with a molded
fondant cupcake.
Making silicone molds is very simple. I use silicone plastique from makeyourownmolds.com
As you can see I bought a lifetime supply.  I bought the materials at the Oklahoma Sugar
Art Show and did not have to pay shipping so I got the large bucket. All you have to do
is mix the two compounds together until they are a uniform color. 
The modeling material is workable for about 20 minutes. First apply a thin layer over the item
you want to mold then, completely cover it. I used a cupcake eraser. It is a little messy and
sticky so working on silpat is helpful.

The mold takes about one hour, and sometimes more, to completely dry.
The mold is ready to use. That's it! I have been wanting to mold this
cupcake eraser for awhile. I love how it turned out.
I think it is perfect for Valentine's Day.


I used a large french pastry tip to decorate the cupcakes.
The one I have is an Ateco 9FT.
Happy Valentine's Day!

Tuesday, December 20, 2011

Gingerbread with Edible Images

Almost any kind of paper can be used for making edible images. Scrapbook paper, wrapping paper or
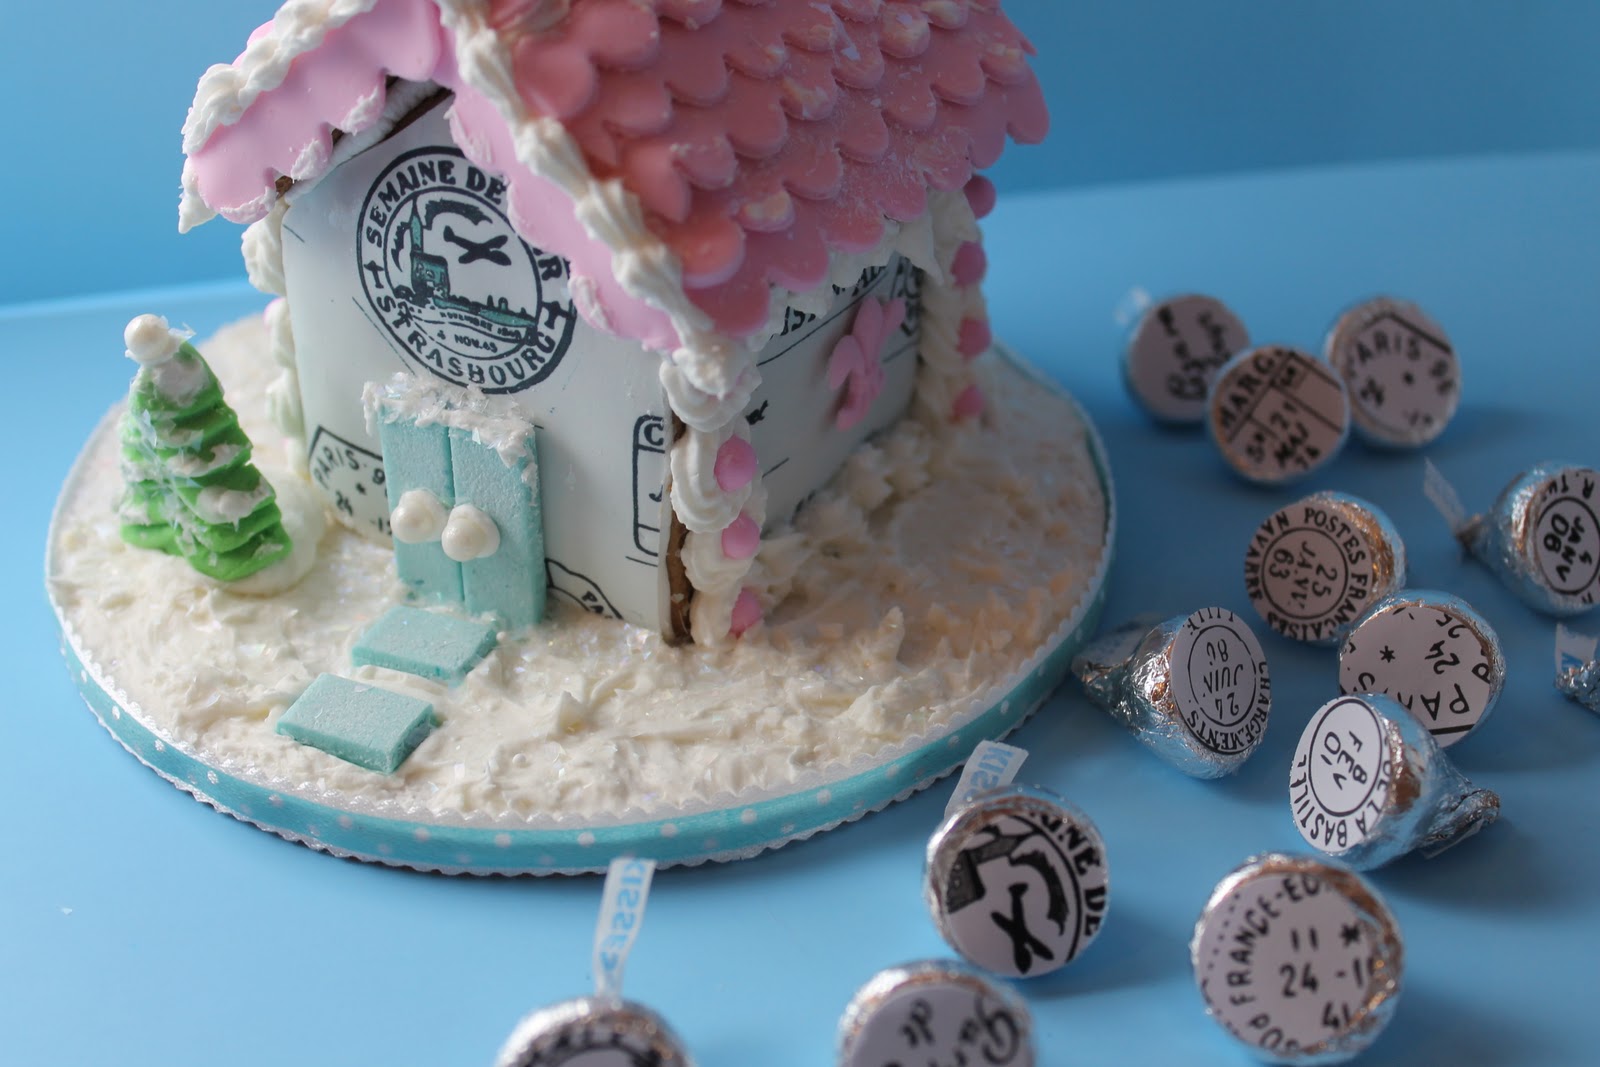
printables from the internet are all good options. I used a french postmark from Cathe Holden's website justsomethingimade.com for this project. I cut apart the images, spread them apart and reprinted to make it work for the gingerbread house. Then I took it to my local cake shop
and had them print an edible image for me.

 Roll out fondant larger than the edible image you want to use, it should be fairly thin.
 I use a spray bottle of water (like the kind you get in an airline travel kit) to attach the
edible image to the fondant. Use a paper towel or fingertip to spread the water evenly.
It should be damp with no puddling.
 Lay the gingerbread pieces on top and use as a pattern to cut out the edible image
pieces. Pay attention to what designs you are cutting.
 Piping gel and a brush work best to attach the fondant to the gingerbread.
Lay the pieces facedown to elimante bubbles.
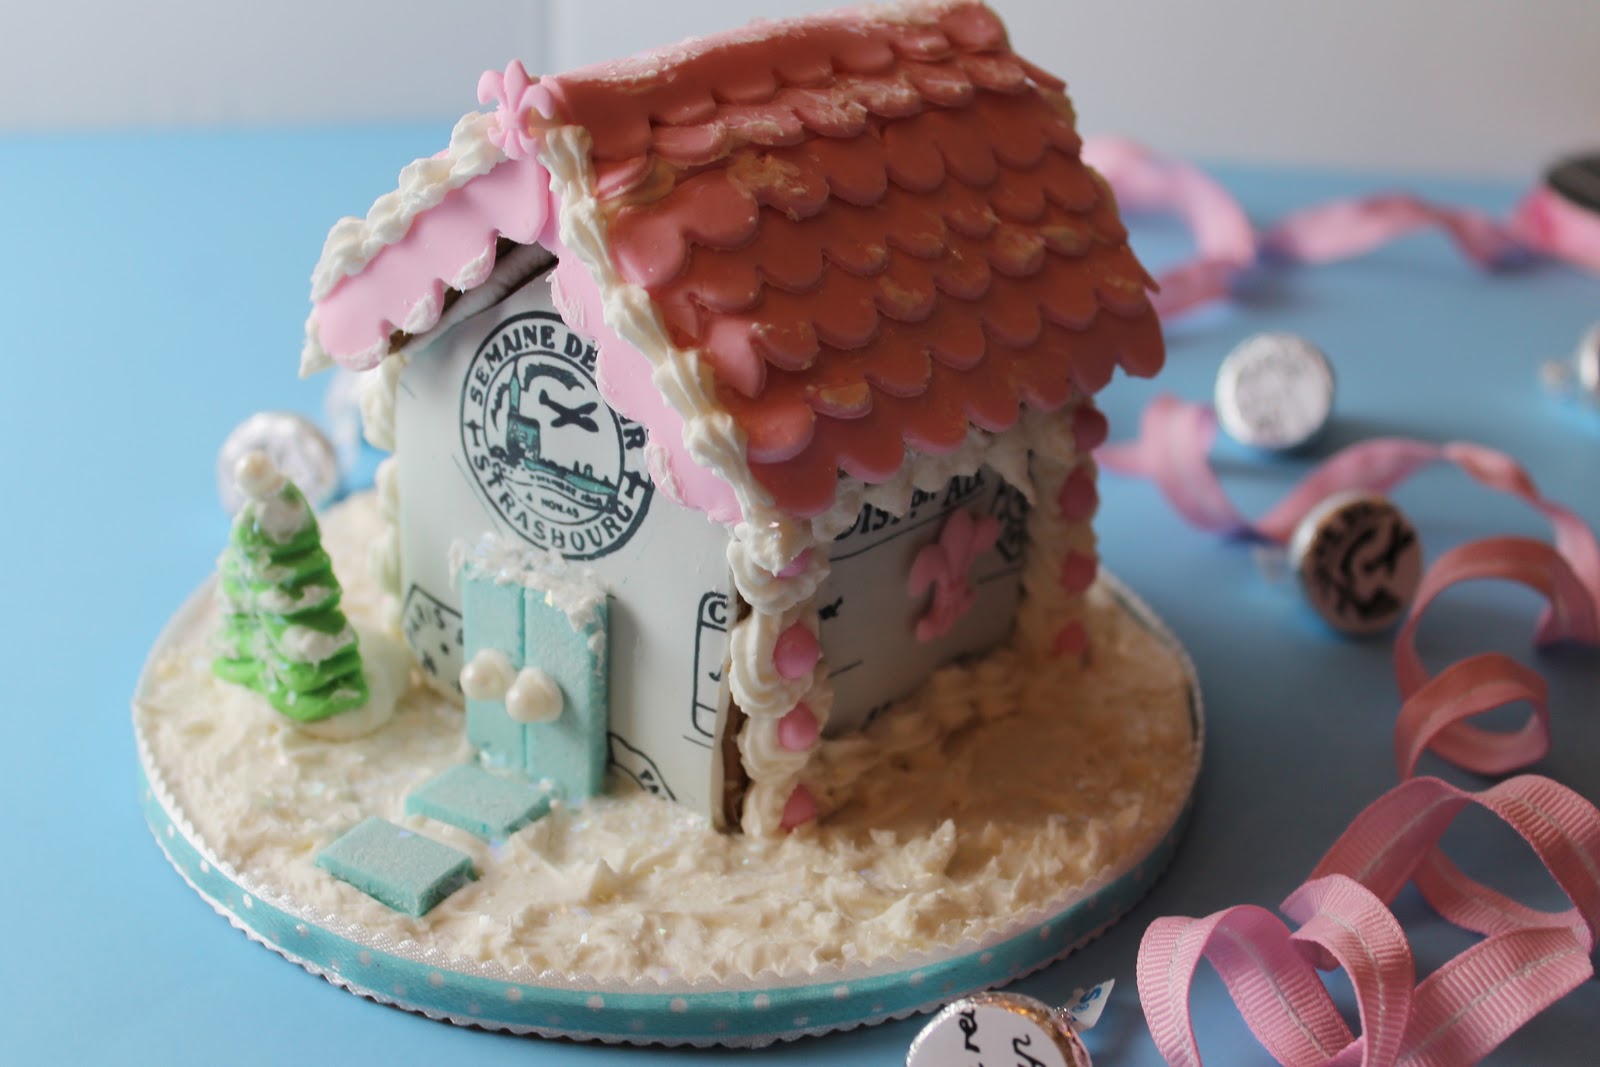
 Once all of the pieces are covered, assemble the house with royal icing as you normally
would. Candy and fondant decorations can be attached to the edible image pieces.
 I used more of the printable paper to decorate the Hershey's Kisses.
Gingerbread houses make great centerpieces. They are charming in the middle of cookie trays.
That is where mine will be. Happy Holidays!

Monday, November 7, 2011

Red Velvet Cupcakes in Reverse


I like red velvet cake. But, one day I wondered...what would red velvet frosting taste like? I love chocolate icing and adding the red velvet dimension would only make it better, wouldn't it? I just had to find out. After a few rounds of trying this is what I came up with. I might actually like it better this way!

Cream Cheese Cupcakes

1 cup (2 sticks) unsalted butter, softened                                      
1 package (8 ounces) cream cheese, softened                               
1 1/2 cups granulated sugar                                                            
4 large eggs, room temperature
2 teaspoons vanilla extract
2 1/4 cups all purpose flour
1 1/2 teaspoons baking powder  
 1/2 teaspoon salt

In a large bowl with a hand-held mixer, beat butter and cream cheese until smooth. Gradually add sugar and beat until light and fluffy. In a 2-cup measure, lightly beat together eggs and vanilla. With mixer at medium speed, slowly pour into cream cheese mixture.

In a medium bowl, whisk together flour, baking powder, and salt. With mixer at low speed, slowly add to cream cheese mixture, mixing just until combined.

Using a batter scoop, spoon batter evenly into 24 paper-lined muffin cups, filling two-thirds full. Bake at 350 F for 18 - 20 minutes or until center springs back.
Makes 24 cupcakes

Red Velvet Frosting

1/2 cup (1 stick) unsalted butter, softened                                      
3 tablespoons milk                                                                         
2 tablespoons buttermilk                                                                
1 teaspoon red wine vinegar                                                          
1 teaspoon vanilla extract
3/4 cup unsweetened cocoa powder
4 cups powdered sugar
Red food coloring
In a large bowl with a hand-held mixer, beat butter until creamy. Add milk, buttermilk, vinegar, and vanilla; beat a low speed until thoroughly combined.

With mixer at low speed, slowly add cocoa powder and powdered sugar, using towel over bowl to prevent sugar from spraying out, beating until well combined. Add 3 to 4 drops red food coloring and beat at medium speed until evenly tinted. Add more food color if desired to reach red velvet shade.
  1. Makes enough icing to frost 24 cupcakes.

Sunday, October 30, 2011

Vintage Halloween Dessert Table

So much to celebrate at Halloween, so many opportunities to make a dessert table! I did not miss a single chance. I have collected antique Halloween decorations for years and I was happy to have the chance to get them out and incorporate them into a table scape. The black and orange fabric caught my eye and it worked well for a backdrop. I used a light colored burlap for the tablecloth, raw edges left as is.
Tier of Donuts

Coconut Cloud Donuts

The crow considers.

Toxic Donuts

Chocolate Donuts with
Chocolate Ganache

A ghost and a donut.

Antique Candy Basket

Treat!


Owl Cupcake

Mini Candy Bars


Cupcake Tower


Candy eyes and Pumpkin Taffy

The Dessert Table


Baked Treats by Jeannie Gearin
Photography by Marisa Gearin
Printables from AndersRuff.com


Wednesday, September 14, 2011

School Colors Chocolate Bark

It's the middle of September and school is in full swing. College students have returned to campus, soccer games have begun. I have more time for baking and more occasions to bake for. I am always looking for new ways to do things. Incorporating school colors into dessert tables, college care packages and parties is on my mind this time of year.
For some reason, I woke up in the middle of the night thinking about Truman Bark. My ideas don't usually come to me this way. I am not sure this idea is even worthy of losing sleep over. But, I decided I may as well try it, now that the image has implanted itself so firmly in my mind.

School Color Bark
10 ounces white chocolate couverture
4 ounces school color couverture
1 cup (4 ounces) chopped macadamia nuts

In a microwave safe bowl, melt the white chocolate on half power in 15 second intervals, stirring well each time. Be careful not to overheat, white chocolate should not even feel warm to the touch. Much of the melting will take place during the stirring.  When it is melted and silky, stir in the macadamia nuts, reserving the small bits to sprinkle on top. Pour into a 9x9 pan lined with parchment paper.

Meanwhile, melt the second color of chocolate in the same way. If you are confident in your chocolate melting, you can melt both at the same time, stirring one chocolate while the other is in the microwave and then switching. If it is your first time melting chocolate, don't try it.

Swirl the second color on top in a pleasing pattern. Allow to cool and set at room temperature for two hours. It does not need refrigeration. Break into about 30 pieces.

The variations are endless. Let me know what colors and combinations you come up with.


I am so proud of my Barry Cacao gloves. It is helpful to wear gloves when working with chocolate to prevent fingerprints and melting the chocolate. You can buy ordinary white ones at any cake and candy supply shop.


If your mascot is something easy like a bulldog, you may find a chocolate mold for it and you can add that to the bark.


Photography     Marisa Gearin
Twine     The Twinery
Tags    SpikeandPippa at etsy.com